Laravel 10 Yajra Datatables Integration Tutorial
Last Updated: 29 Jan, 2024In this tutorial, you will learn How to Implement Laravel Yajra Datatables in Laravel 10 Application. Laravel Yajra DataTables is a package that allows you to handle the server-side works of DataTables using Laravel. Yajra Datatables is a jQuery DataTables API that is used to handle server-side functionalities of jQuery DataTables plugin via AJAX option. It works very well with Eloquent ORM and Query Builder. To acheive this, you will be installing yajra/laravel-datatables-oracle composer package.
How to Integrate Laravel Yajra Datatables in Laravel 10?
Step 1: Install a New Laravel 10 Application
First of all, let's install a latest laravel 10 application in your local. Open a new tab in your terminal and please run the following command:
composer create-project laravel/laravel l10yajradatatables
Step 2: Configure Database Connection
Next, let's modify these database configuration variables in .env file as follows:
DB_CONNECTION=mysql
DB_HOST=127.0.0.1
DB_PORT=3306
DB_DATABASE=l10yajradatatables
DB_USERNAME=dbusername
DB_PASSWORD=dbpassword
Step 3: Install Yajra Datatables Package
Next, install yajra/laravel-datatables-oracle composer package to have Yajra Datatables feature in our application. To install this package, run below command in terminal:
composer require yajra/laravel-datatables-oracle:"^10.0"
Once you are done with Yajra Datatables package installation, register the DatatablesServiceProvider in the config/app.php file as follows:
<?php

use Illuminate\Support\Facades\Facade;
use Illuminate\Support\ServiceProvider;

return [
    ...
    ...
    /*
    |--------------------------------------------------------------------------
    | Autoloaded Service Providers
    |--------------------------------------------------------------------------
    |
    | The service providers listed here will be automatically loaded on the
    | request to your application. Feel free to add your own services to
    | this array to grant expanded functionality to your applications.
    |
    */

    'providers' => ServiceProvider::defaultProviders()->merge([
        /*
         * Package Service Providers...
         */
        Yajra\DataTables\DataTablesServiceProvider::class,

        /*
         * Application Service Providers...
         */
        App\Providers\AppServiceProvider::class,
        App\Providers\AuthServiceProvider::class,
        // App\Providers\BroadcastServiceProvider::class,
        App\Providers\EventServiceProvider::class,
        App\Providers\RouteServiceProvider::class,
    ])->toArray(),

    /*
    |--------------------------------------------------------------------------
    | Class Aliases
    |--------------------------------------------------------------------------
    |
    | This array of class aliases will be registered when this application
    | is started. However, feel free to register as many as you wish as
    | the aliases are "lazy" loaded so they don't hinder performance.
    |
    */
    'aliases' => Facade::defaultAliases()->merge([
        // 'Example' => App\Facades\Example::class,
        'DataTables' => Yajra\DataTables\Facades\DataTables::class,
    ])->toArray(),
];
Next, you can also run below command which is optional:
php artisan vendor:publish --provider="Yajra\DataTables\DataTablesServiceProvider"
Step 4: Create Product Model & Migration
Next, lets create a model named Product and migration for it using below php artisan make:model command:
php artisan make:model Product -m
Above command will create a model file named app/Models/Product.php and a migration file named database/migrations/*_create_products_table.php. Open the migration file and copy below code in it:
<?php

use Illuminate\Database\Migrations\Migration;
use Illuminate\Database\Schema\Blueprint;
use Illuminate\Support\Facades\Schema;

return new class extends Migration
{
    /**
     * Run the migrations.
     */
    public function up(): void
    {
        Schema::create('products', function (Blueprint $table) {
            $table->id();
            $table->string('name');
            $table->decimal('mrp', 8, 2)->default(0.00);
            $table->decimal('price', 8, 2)->default(0.00);
            $table->unsignedInteger('quantity')->default(0);
            $table->unsignedTinyInteger('status')->default(0);
            $table->timestamp('created_at')->useCurrent();
            $table->timestamp('updated_at')->useCurrent()->useCurrentOnUpdate();
        });
    }

    /**
     * Reverse the migrations.
     */
    public function down(): void
    {
        Schema::dropIfExists('products');
    }
};
once you are done with model and migration files, let's run the below command that will run the laravel migration and create the tables in MySQL DB:
php artisan migrate
Open the Models/Product.php file and copy the below given code onto it:
<?php

namespace App\Models;

use Illuminate\Database\Eloquent\Factories\HasFactory;
use Illuminate\Database\Eloquent\Model;

class Product extends Model
{
    use HasFactory;

    protected $fillable = [
        'name',
        'mrp',
        'price',
        'quantity',
        'status'
    ];
}
Step 5: Create ProductSeeder and Insert Dummy Records
Next, we will be using laravel seeder to seed products table with sample records. Use below command to create ProductSeeder.php
php artisan make:seeder ProductSeeder
Open the database/seeders/ProductSeeder.php file and copy the below given code onto it:
<?php

namespace Database\Seeders;

use Illuminate\Database\Console\Seeds\WithoutModelEvents;
use Illuminate\Database\Seeder;
use App\Models\Product;

class ProductSeeder extends Seeder
{
    /**
     * Run the database seeds.
     *
     * @return void
     */
    public function run(): void
    {
        Product::truncate();
        foreach (range(1,500) as $index) {
            Product::insert([
                'name' => 'Product'.$index,
                'mrp' => fake()->randomElement([1999.00, 2199.00, 2399.00, 2599.00, 2799.00, 2999.00]),
                'price' => fake()->randomElement([999.00, 1099.00, 1199.00, 1299.00, 1399.00, 1499.00]),
                'quantity' => fake()->randomElement([5, 10, 15, 20, 25, 30]),
                'status' => fake()->randomElement([1,0])
            ]);
        }
    }
}
Next, run the ProductSeeder using below command in terminal:
php artisan db:seed --class=ProductSeeder
Step 6: Create and Set Up Product Controller
In this step, we have to create ProductController by running below command in terminal that will create app/Http/Controllers/ProductController.php file.
php artisan make:controller ProductController
Next, open the app/Http/Controllers/ProductController.php and copy below code in it:
<?php

namespace App\Http\Controllers;

use Illuminate\Http\Request;
use DataTables;
use App\Models\Product;

class ProductController extends Controller
{
    /**
     * Display a listing of the resource.
     *
     * @return \Illuminate\Http\Response
     */
    public function index(Request $request)
    {
        $view_data['title'] = 'How to Integrate Yajra Datatables in Laravel 10?';
        if (!$request->ajax()) {
            return view('products.index')->with($view_data);
        } else {
            $request_data = $request->all();
            $products = Product::orderBy('id', 'desc')->get();
            return Datatables::of($products)
            ->addIndexColumn()
            ->addColumn('action', function($row){
                $actions = '<a href="javascript:void(0)" class="btn btn-primary">View</a>';
                return $actions;
            })
            ->rawColumns(['action'])
            ->make(true);
        }
    }
}
Step 7: Setup Product Routes
Next, open routes/web.php and copy below code in it:
<?php

use Illuminate\Support\Facades\Route;
use App\Http\Controllers\ProductController;

/*
|--------------------------------------------------------------------------
| Web Routes
|--------------------------------------------------------------------------
|
| Here is where you can register web routes for your application. These
| routes are loaded by the RouteServiceProvider within a group which
| contains the "web" middleware group. Now create something great!
|
*/
Route::get('/', function () {
    return view('welcome');
});
Route::get('/products', [ProductController::class, 'index']);
Step 8: Create Product Blade Files
Next, create resources/views/products/index.blade.php file and copy below code in it:
<!DOCTYPE html>
<html>
<head>
    <meta charset="utf-8">
    <meta name="viewport" content="width=device-width, initial-scale=1">
    <title>Laravel 10 Yajra Datatables Tutorial</title>
    <meta name="csrf-token" content="{{ csrf_token() }}">
    <link href="https://cdn.jsdelivr.net/npm/bootstrap@5.1.3/dist/css/bootstrap.min.css" rel="stylesheet" crossorigin="anonymous">
    <link rel="stylesheet" type="text/css" href="https://cdn.datatables.net/1.10.21/css/jquery.dataTables.min.css">
    <link rel="stylesheet" type="text/css" href="https://cdn.datatables.net/1.10.21/css/dataTables.bootstrap4.min.css">
</head>
<body>
    <div class="container p-3 bg-light">
        <div class="row text-center">
            <h1>How to Integrate Yajra Datatables in Laravel 10</h1>
        </div>
        <div class="row">
            <div class="col-12">
                <table class="table table-primary table-bordered product-table">
                  <thead>
                    <tr>
                      <th scope="col">id</th>
                      <th scope="col">name</th>
                      <th scope="col">mrp</th>
                      <th scope="col">price</th>
                      <th scope="col">quantity</th>
                      <th scope="col">status</th>
                      <th scope="col">action</th>
                    </tr>
                      </thead>
                      <tbody>
                      </tbody>
                </table>
            </div>
        </div>
    </div>
<script type="text/javascript" src="https://ajax.googleapis.com/ajax/libs/jquery/1.9.1/jquery.min.js"></script>
<script type="text/javascript" src="https://cdnjs.cloudflare.com/ajax/libs/jquery-validate/1.19.0/jquery.validate.min.js"></script>
<script type="text/javascript" src="https://cdn.jsdelivr.net/npm/bootstrap@5.1.3/dist/js/bootstrap.min.js"></script>
<script type="text/javascript"src="https://cdn.datatables.net/1.10.21/js/jquery.dataTables.min.js"></script>
<script type="text/javascript" src="https://cdn.datatables.net/1.10.21/js/dataTables.bootstrap4.min.js"></script>
<script type="text/javascript">
$(function () {
    var table = $('.product-table').DataTable({
        processing: true,
        serverSide: true,
        ajax: "{{ url('products') }}",
        columns: [
            {data: 'DT_RowIndex', name: 'DT_RowIndex'},
            {data: 'name', name: 'name'},
            {data: 'mrp', name: 'mrp'},
            {data: 'price', name: 'price'},
            {data: 'quantity', name: 'quantity'},
            {data: 'status', name: 'status'},
            {data: 'action', name: 'action', orderable: true, searchable: true}
        ]
    });
});
</script>
</body>
</html>
Step 9: Run Laravel Application
Next, run below artisan command in terminal to start laravel development server:
php artisan serve
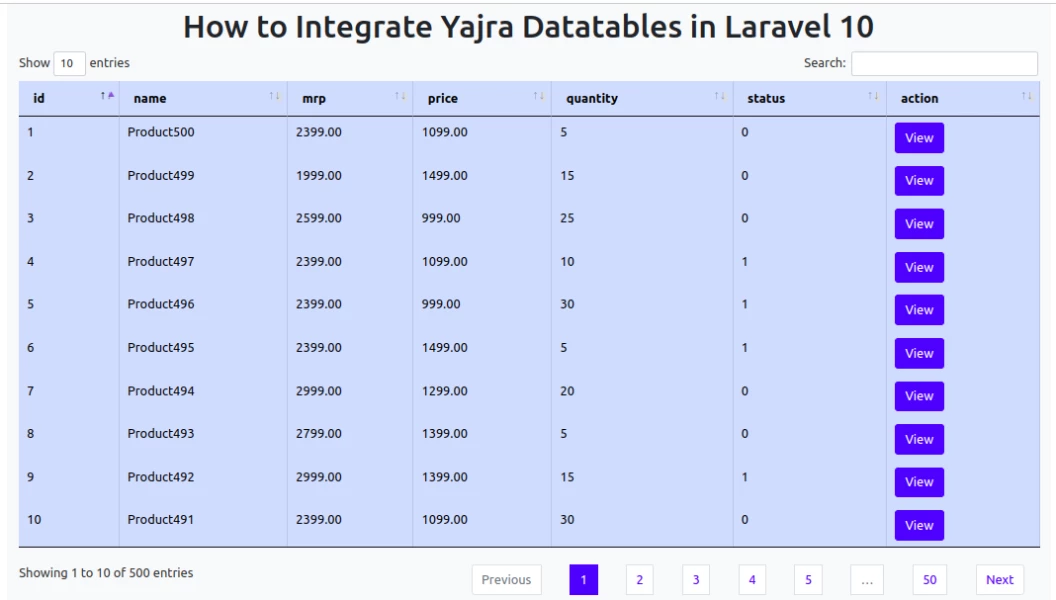
Step 10: Test Application in Browser
Finally, open browser and check below url and test your application:
http://127.0.0.1:8000/products
Application OUTPUT
Recommended Posts

Laravel 10 CRUD Application Tutorial for Beginners
In this simple and comprehensive tutorial you are going to learn how to install Laravel 10 and create a New Laravel 10 CRUD Application.
Laravel 10 Multiple Guards Authentication Application Tutorial
This tutorial will provide you a clear understanding of how can you setup a multiple authentication guards application in Laravel 10 with the help of examples.
Simplified Laravel 10 Image Upload Application Using Spatie Media Library
This tutorial will provide you step-by-step guidance How to Upload Images Using Spatie Media Library in Laravel 10 Application.