Laravel 10 Livewire Image Upload Tutorial With Example
Last Updated: 16 Feb, 2024In this tutorial, we will learn How to Upload Image Using Livewire in Laravel 10 Application. To acheive this, we will be using livewire/livewire composer package. Follow the below mentioned step-by-step guidance.
What is Livewire?
Livewire is a very easy to understand full-stack framework for Laravel that allows you to build dynamic interfaces very easily, without leaving the comfort of Laravel.
How does Livewire work?
- Livewire renders the output of the initial component with the page. It is very similar to a Blade include. Because of this, Livewire is SEO friendly.
- Whenever any interaction occurs in the page, Livewire makes an AJAX request to the backend server with the updated data. And then the server tries to re-renders the component and responds with the updated HTML.
- Finally, Livewire intelligently tries to mutate DOM (Document Object Model) according to the things that changed.
How to Upload Image Using Livewire in Laravel 10 Application?
Now, we will go through the above given steps one-by-one to and get it done.
Step 1: Install New Laravel 10 Application
First of all, let's install a new laravel 10 application. Open your terminal window and run the below command:
composer create-project laravel/laravel l10livewireimageupload
Step 2: Configure Database Connection
Next, let's update below configuration variables in .env file as follows:
APP_URL=http://127.0.0.1:8000
DB_CONNECTION=mysql
DB_HOST=127.0.0.1
DB_PORT=3306
DB_DATABASE=l10livewireimageupload
DB_USERNAME=dbusername
DB_PASSWORD=dbpassword
Step 3: Install Laravel Livewire Package
Next, let's install livewire/livewire composer package. Run below command in the terminal to do so:
composer require livewire/livewire
Step 4: Create Product Model & Migration
Next, let's create a model named Product and migration for it using below command:
php artisan make:model Product -m
Above command will create a model file named app/Models/Product.php and a migration file named database/migrations/*_create_products_table.php.
Open the database/migrations/*_create_products_table.php migration file and copy below code in it:
<?php

use Illuminate\Database\Migrations\Migration;
use Illuminate\Database\Schema\Blueprint;
use Illuminate\Support\Facades\Schema;

return new class extends Migration
{
    /**
     * Run the migrations.
     */
    public function up(): void
    {
        Schema::create('products', function (Blueprint $table) {
            $table->id();
            $table->string('name', 100);
            $table->string('path', 255);
            $table->timestamp('created_at')->useCurrent();
            $table->timestamp('updated_at')->useCurrent()->useCurrentOnUpdate();
        });
    }

    /**
     * Reverse the migrations.
     */
    public function down(): void
    {
        Schema::dropIfExists('products');
    }
};
Open the app/Models/Product.php model file and copy the below given code onto it:
<?php

namespace App\Models;

use Illuminate\Database\Eloquent\Factories\HasFactory;
use Illuminate\Database\Eloquent\Model;

class Product extends Model
{
    use HasFactory;

    protected $fillable = [
        'name',
        'path'
    ];
}
Once you are done with model and migration files, let's run the below command that will run the laravel migration and create the tables in MySQL DB:
php artisan migrate
Step 5: Create Livewire Component
Next, let's create a livewire component called ProductImageUpload by using below command:
php artisan make:livewire ProductImageUpload
Above command will generate below two files:
app/Livewire/ProductImageUpload.php
resources/views/livewire/product-image-upload.blade.php
Open app/Livewire/ProductImageUpload.php file and copy the below code in it:
<?php

namespace App\Livewire;

use Livewire\Component;
use Livewire\WithFileUploads;
use Illuminate\Http\Request;
use App\Models\Product;

class ProductImageUpload extends Component
{
    use WithFileUploads;

    public $name;
    public $image;

    public function render()
    {
        $view_data = [];
        $products = Product::all();
        return view('livewire.product-image-upload', [
            'products'=>$products
        ]);
    }

    public function submit(Request $request)
    {

        $valid_data = $this->validate([
            'name' => 'required|string|unique:products,name',
            'image' => 'required|image|mimes:jpeg,jpg,png,gif,webp,svg|max:2048'
        ]);

        $name = trim($valid_data['name']);

        try {
            $extension = $this->image->getClientOriginalExtension();
            $filename = md5($name).'.'.$extension;
            $path = $this->image->store('uploads', 'public');
            Product::insert([
                'name' => $name,
                'path' => $path
            ]);
            session()->flash("message", "Image Uploaded Successfully.");
        } catch (\Exception $e) {
            session()->flash([
                "status" => false,
                "message" => "Error Occured!"
            ]);
        }
    }
}
Open resources/views/livewire/product-image-upload.blade.php file and copy below code in it:
<div class="row">
    <div class="col-12 col-md-4">
        <div class="card bg-warning">
            <div class="card-header text-center text-danger"><h5>Upload New Image</h5></div>
            <div class="card-body">
                @if(session()->has('message'))
                <div class="alert alert-success">
                    {{session('message')}}
                </div>
                @endif
                <form wire:submit.prevent="submit" method="POST" enctype="multipart/form-data">
                    <div class="form-group mb-3">
                        <label for="name">Image Name</label>
                        <input type="text" name="name" id="name" class="form-control" placeholder="Enter Product Name" wire:model="name">
                        @error('name')
                        <span class="text-danger">{{$message}}</span>
                        @enderror
                    </div>
                    <div class="form-group mb-3">
                        <label for="image">Image File</label>
                        <input type="file" name="image" id="image" class="form-control" wire:model="image">
                        @error('image')
                        <span class="text-danger">{{$message}}</span>
                        @enderror
                    </div>
                    <div class="form-group">
                        <button type="submit" class="btn btn-primary">Save</button>
                    </div>
                </form>
            </div>
        </div>
    </div>
    <div class="col-12 col-md-8">
        <div class="card bg-info">
            <div class="card-header text-center text-danger"><h5>Uploaded Images</h5></div>
            <div class="card-body">
                <table class="table table-striped table-bordered">
                    <thead>
                        <tr>
                            <th>#</th>
                            <th>Name</th>
                            <th>Image</th>
                        </tr>
                    </thead>
                    <tbody>
                        @forelse($products as $p)
                           <tr>
                                <td>{{$loop->iteration}}</td>
                                <td>{{$p->name}}</td>
                                <td><img style="max-width: 60px;" src="{{asset('storage/'.$p->path)}}"></td>
                           </tr>
                        @empty
                            <tr>
                                <td colspan="3">Record not found!!</td>
                           </tr>
                        @endforelse
                    </tbody>
                </table>
            </div>
        </div>
    </div>
</div>
Step 6: Setup Product Images Routes
Next, open routes/web.php file and copy below code in it:
<?php

use Illuminate\Support\Facades\Route;

/*
|--------------------------------------------------------------------------
| Web Routes
|--------------------------------------------------------------------------
|
| Here is where you can register web routes for your application. These
| routes are loaded by the RouteServiceProvider and all of them will
| be assigned to the "web" middleware group. Make something great!
|
*/

Route::get('/', function () {
    return view('welcome');
});

Route::get('/images', function () {
    return view('products.index');
});
Step 7: Create Product Images Blade Files
In this step, let's create a blade file resources/views/products/index.blade.php and copy below code in it:
<!DOCTYPE html>
<html>
<head>
    <meta charset="utf-8">
    <meta name="viewport" content="width=device-width, initial-scale=1">
    <title>Laravel 10 Livewire Image Upload</title>
    <meta name="csrf-token" content="{{ csrf_token() }}">
    <link href="https://cdn.jsdelivr.net/npm/bootstrap@5.1.3/dist/css/bootstrap.min.css" rel="stylesheet" crossorigin="anonymous">
    @livewireStyles
</head>
<body>
<div class="container">
    <div class="row p-3">
        <div class="col-12">
            <div class="card">
                <div class="card-header text-center text-success">
                    <h2>Laravel 10 Livewire Image Upload</h2>
                </div>
                <div class="card-body">
                    @livewire('product-image-upload')
                </div>
            </div>
        </div>
    </div>
</div>
@livewireScripts
</body>
</html>
Step 8: Link Laravel Storage
Next, we need to link laravel storage folder using below command:
php artisan storage:link
Step 9: Start Development Server
Excellent, now you have to start our development server to test our application.
Run below command in terminal to start laravel development server:
php artisan serve
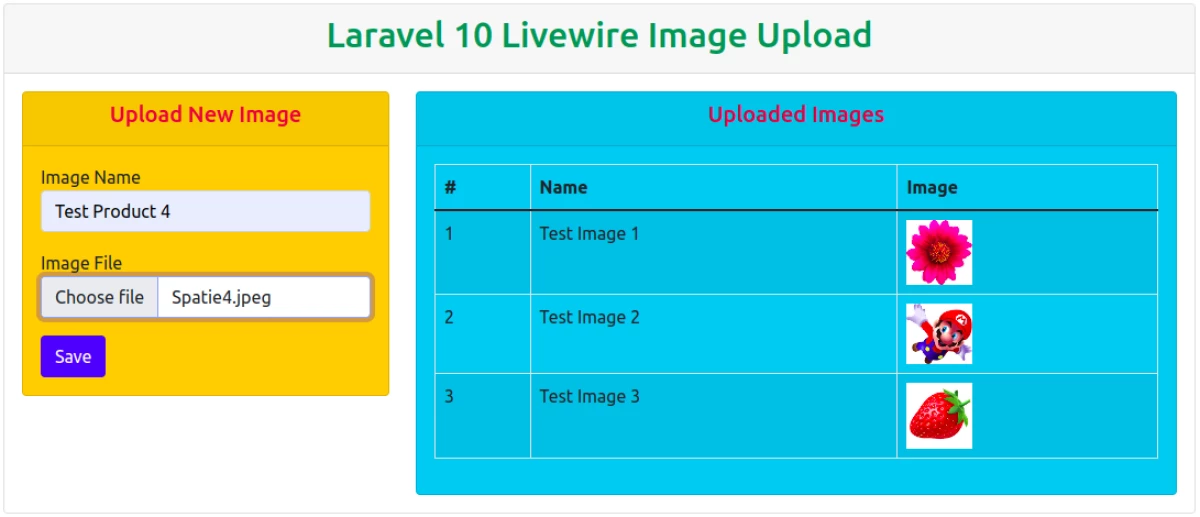
Step 10: Test Application in Browser
Finally, open below route in browser and test your application:
http://127.0.0.1:8000/images
Sample Output
Recommended Posts
Laravel 10 Multiple Guards Authentication Application Tutorial
This tutorial will provide you a clear understanding of how can you setup a multiple authentication guards application in Laravel 10 with the help of examples.
Laravel 10 Yajra Datatables Integration Tutorial
In this tutorial, you will learn How to Implement Yajra Datatables in Laravel 10 Application using yajra/laravel-datatables-oracle composer package.
Laravel 10 Import CSV Data into MySQL Using Laravel Seeder
In this tutorial you will easily understand how to import large set of data from CSV file into MySQL database using Laravel Seeder.